Road Sign Generator

All layouts on the page are fictitious examples, not based on real data.
What is a Generator?
The Road Sing's Generator instantly creates a full-fledged layout for all guides from simple text based on the selected template.
The whole process consists of 3 steps in Adobe Illustrator:
- 1. Opening the Extension in Adobe Illustrator
- 2. Choosing a Template
- 3. Insert the text of the Road Sign
- Done!
Here are examples of texts from simple to more complex, which turn into a ready-made road sign on a separate artboard with technical information (legend). The extension window also lists all the template's features:
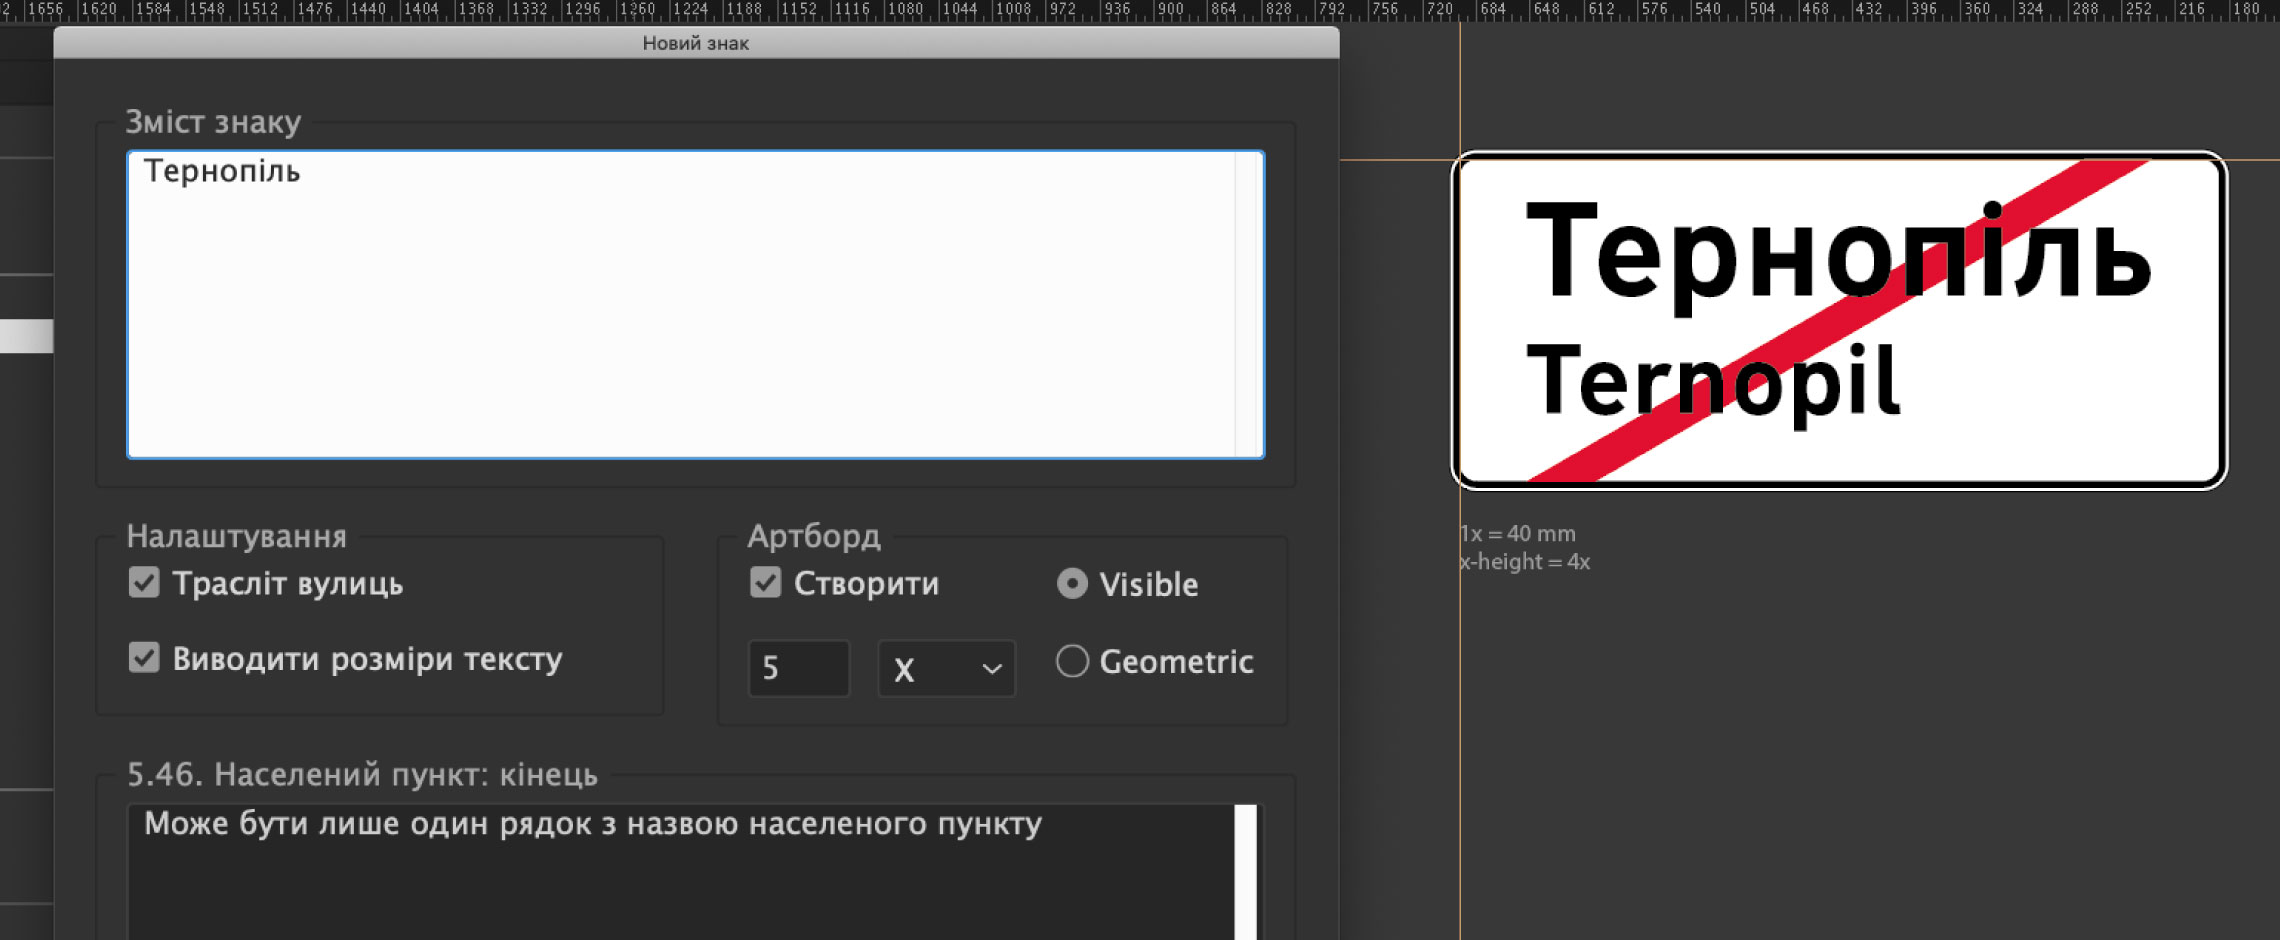
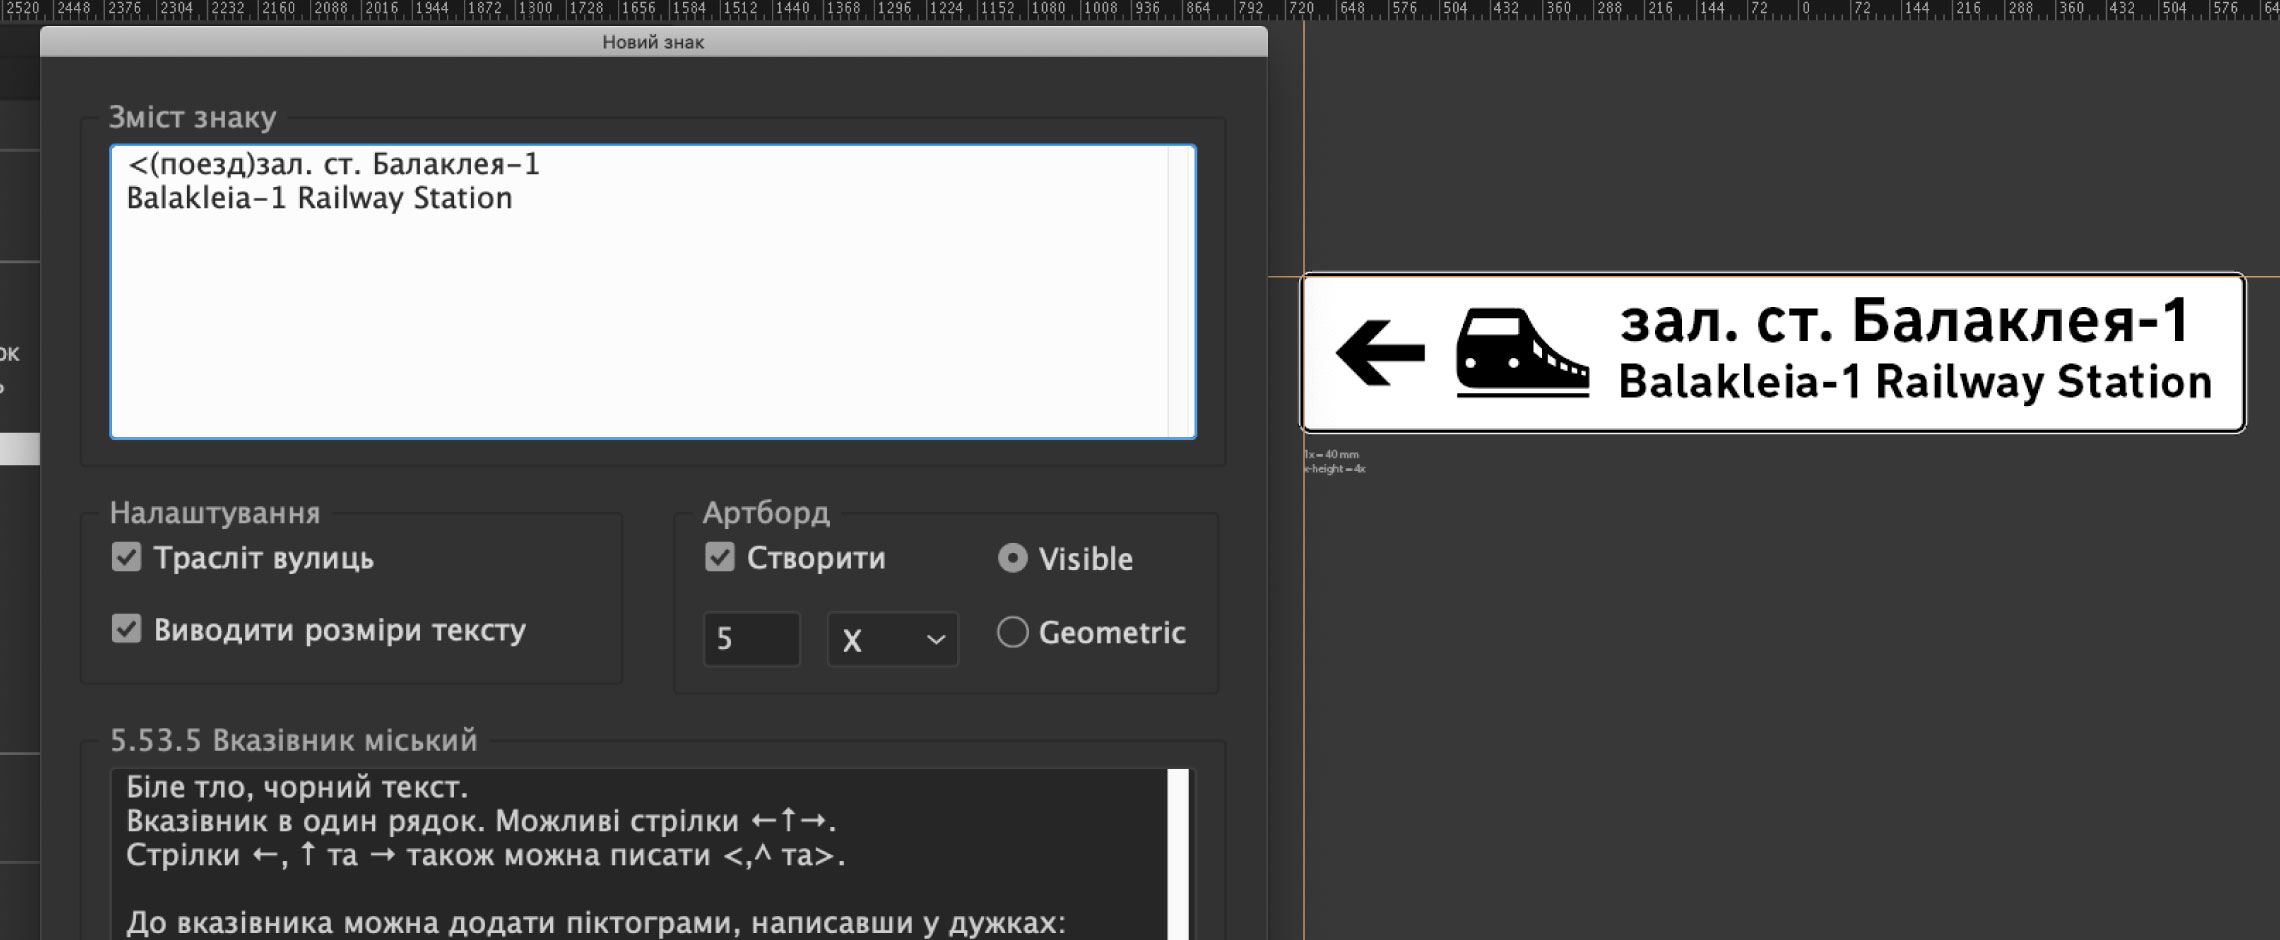
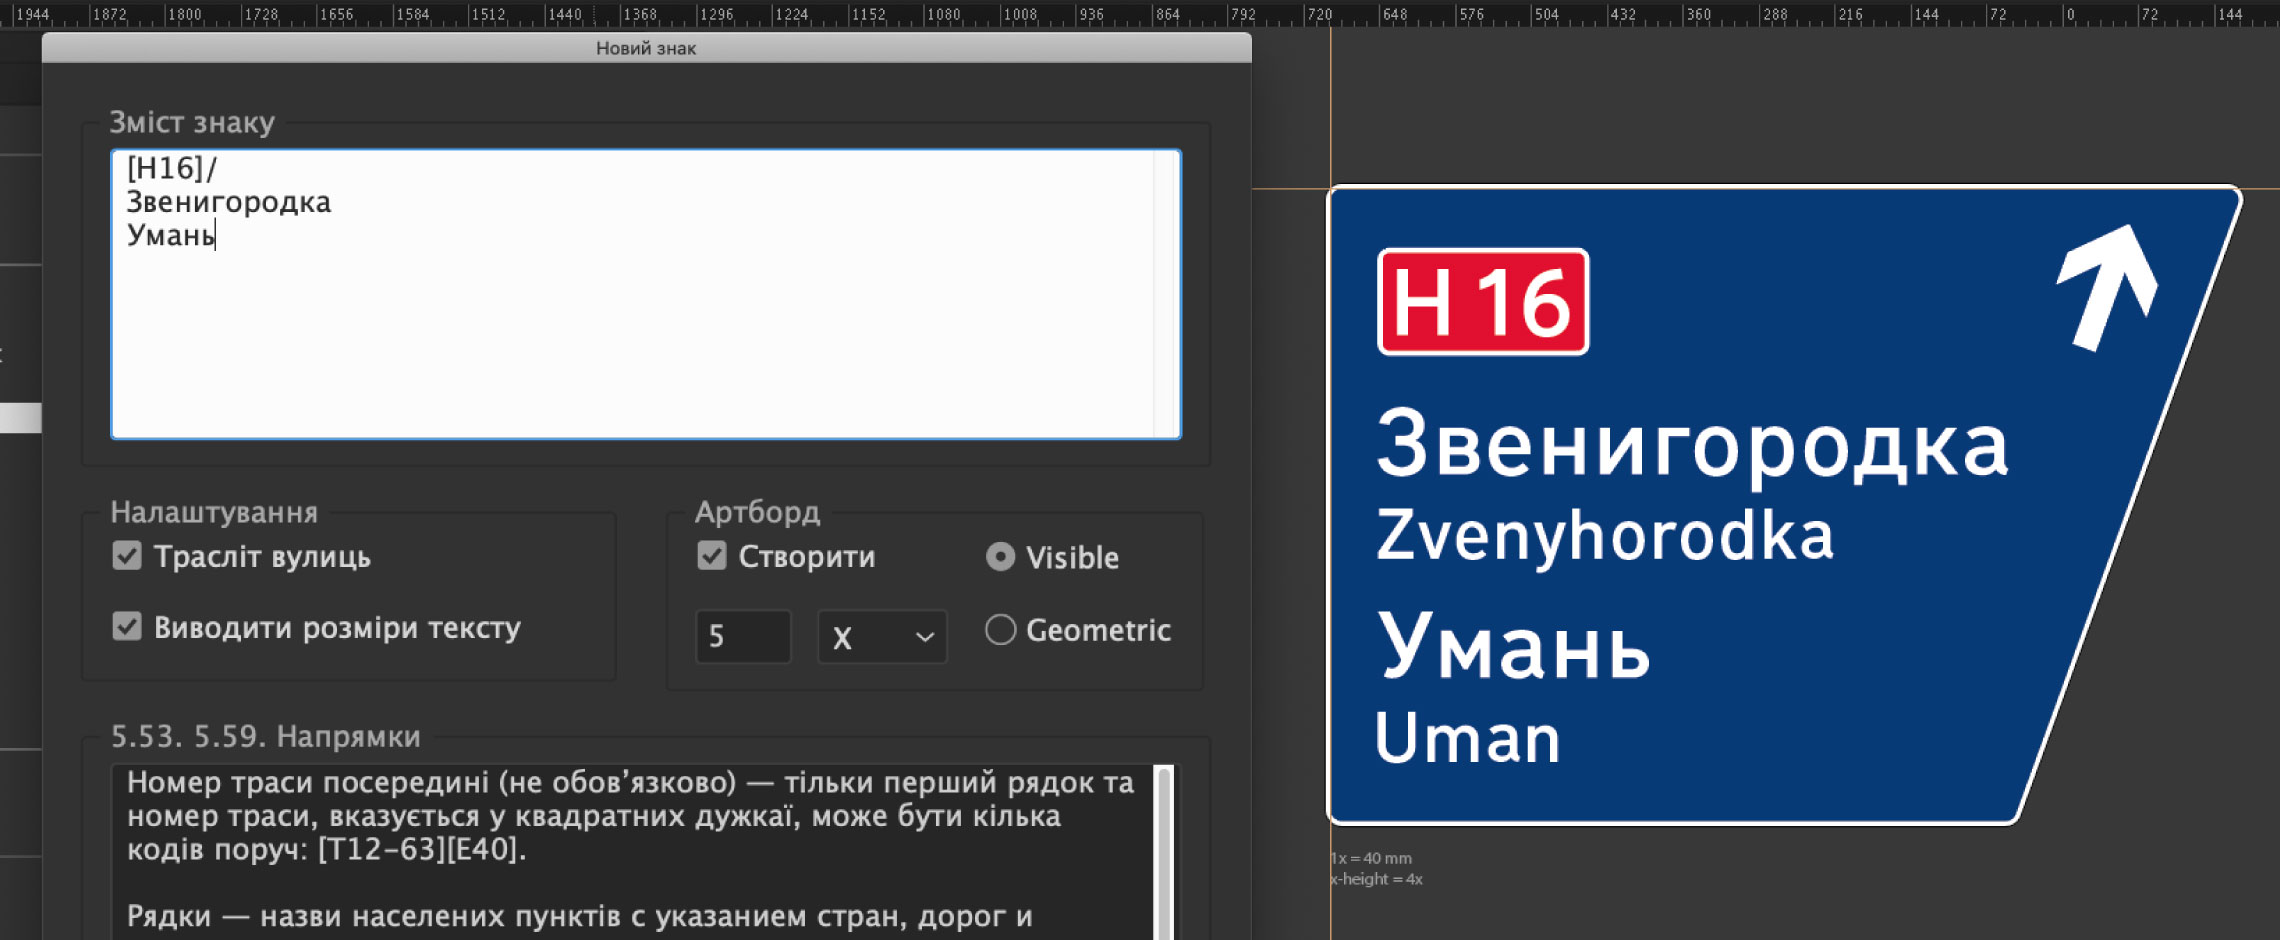
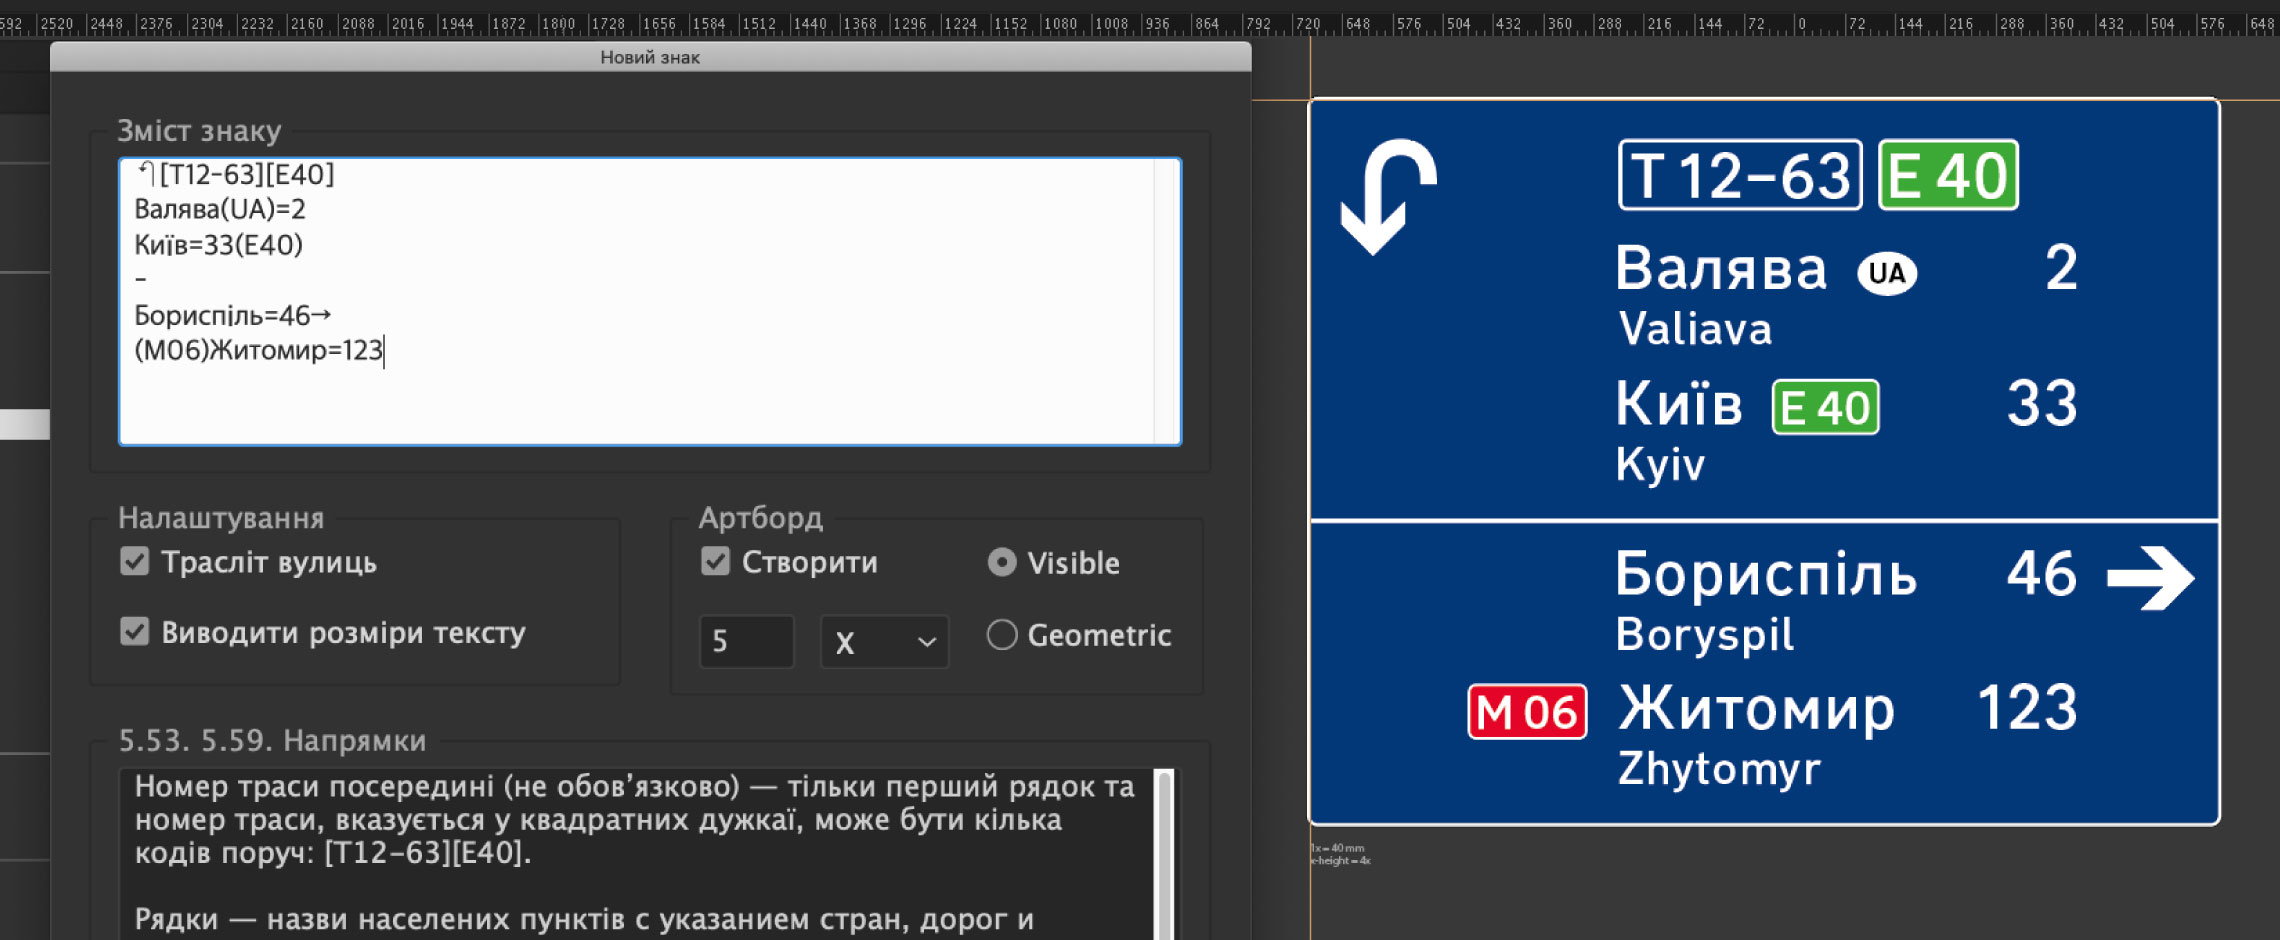
All layouts are instantly displayed in the "Preview" mode. If the Illustrator file does not contain the required colors or symbols, they are instantly created and added to the Symbols library:
Only
It seems that 7 Templates are not enough. But! these are basic templates that can be used to create a huge number of Sign combinations according to design guides. All components of the layouts are taken into account:
- arrow directions — change the direction of icons and padding,
- presence of countries in the direction line
- presence of kilometers — changes padding and alignment
- position of the road symbol before or after titles — change vertical alignment
- the presence of headings and arrows in them — change the alignment of the entire character
- having a slash in the title — creates a slash
Here are more examples of texts and the result of the Generator:
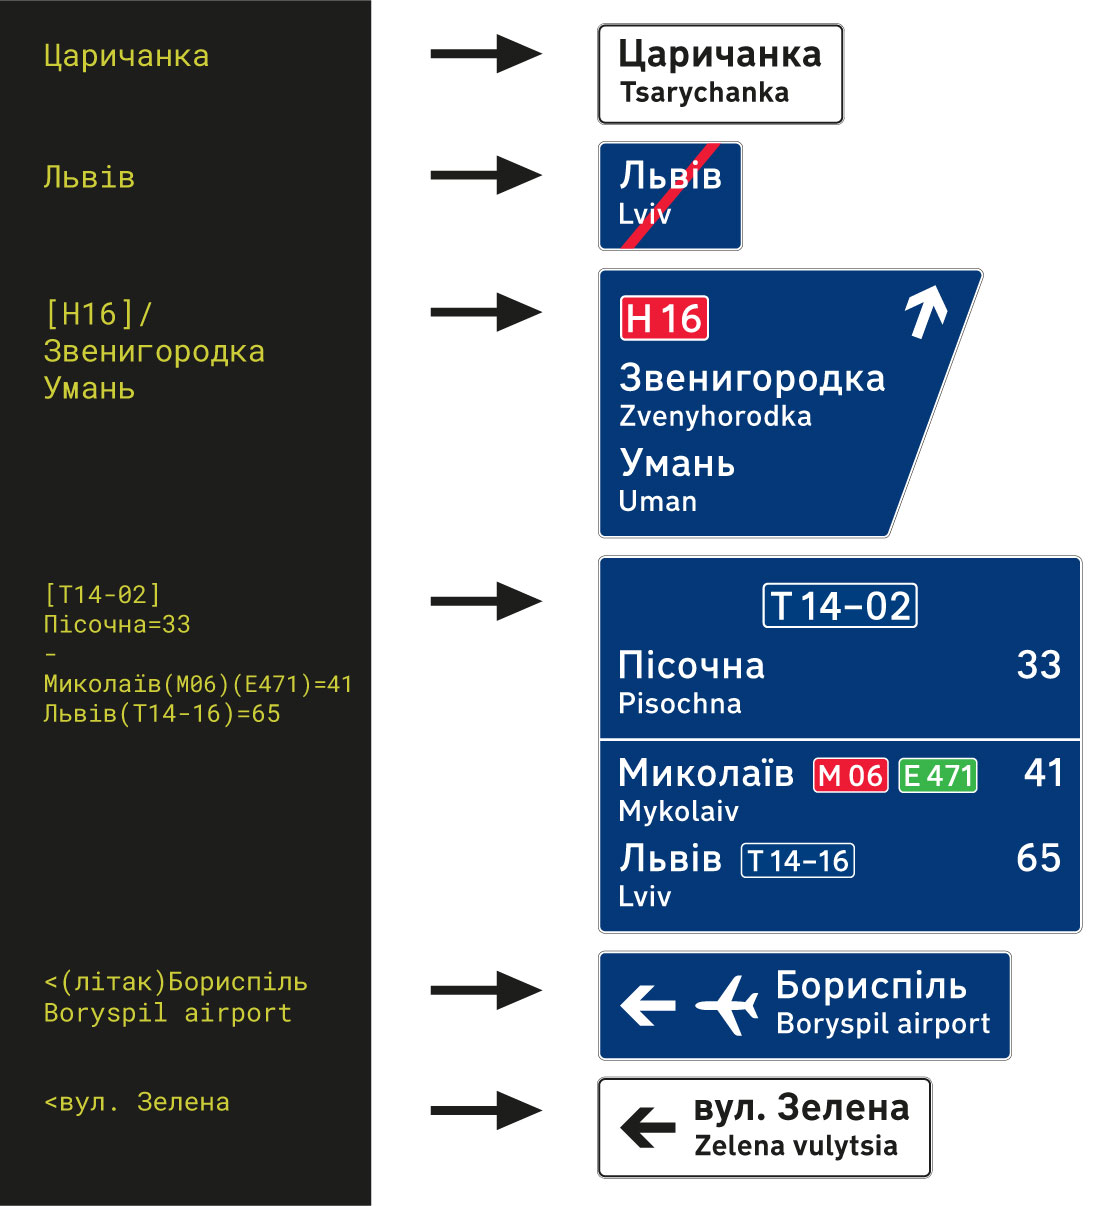
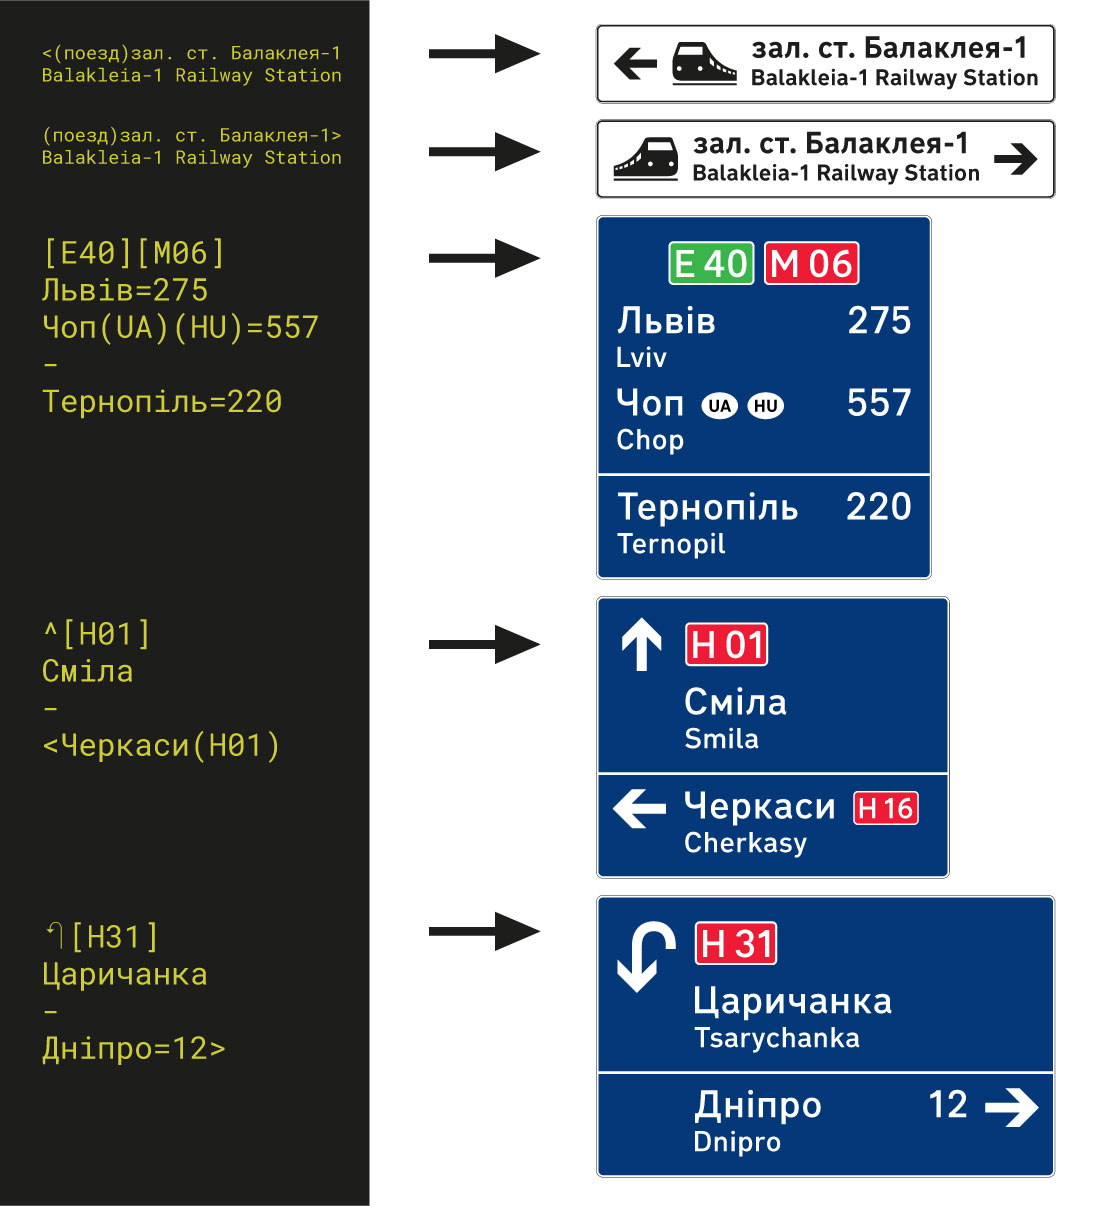
Is this all stored
No, not everything is stored in the extension. The system is more flexible. In short, like this:
1. Designers have developed templates where all font sizes and formats are indicated. The guides describe the alignment rules for different cases of character content:
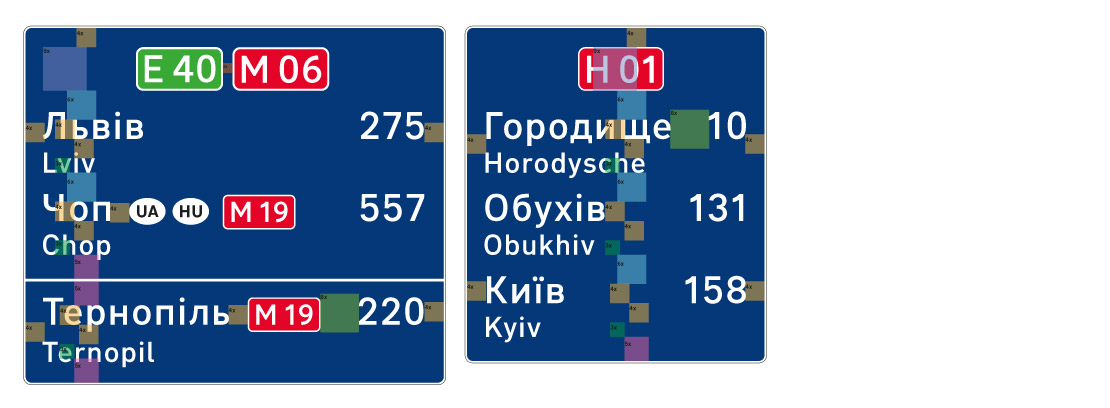
2. The extension knows the structure of this template and the possible occurrence of template elements:
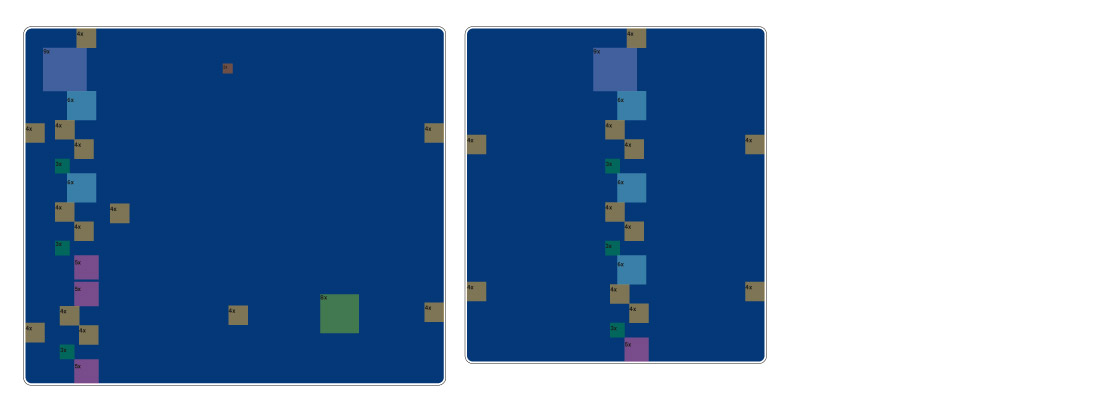
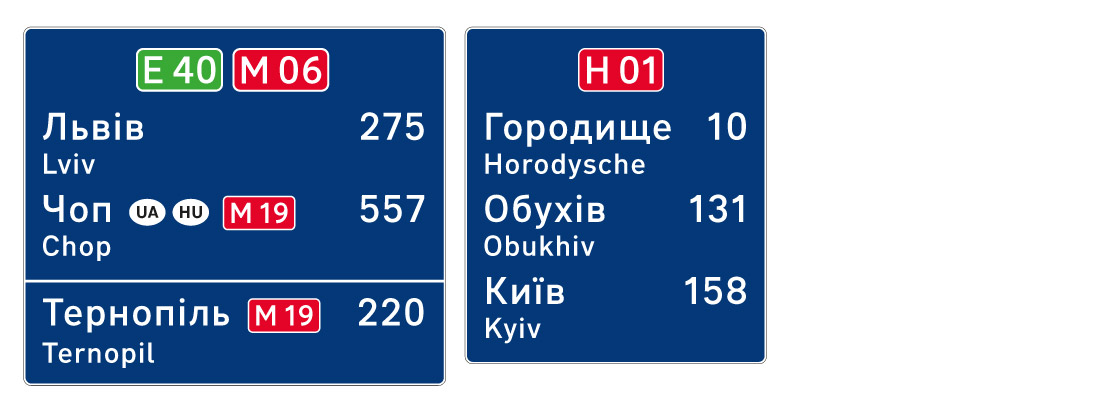
3. The extension asks the site for the presence, size and color of template elements. Based on the received data, it adds these blocks, aligns and paints in the desired colors:
The order of work can be represented as a diagram:
{{image(guide2)}} Here is a video of drawing a sign, slowed down
And if designers work in different places, do they need to keep Templates in sync?
All template parameters are stored on the site and are available remotely at the same time from different places. Having gained access, the designer visits the site, downloads the current version of the extension, and installs it into Illustrator. And the extension itself goes to the site and receives all the information on each template in real time.
If the template administrator changes some parameter: color, size, font — then this parameter will immediately become available to all designers of the team.
Wow, cool! But you can't remember all these codes for Templates: brackets, arrows...
Of course, you can't remember right away. But when you open the template, a window appears in which all possible designations are indicated. There is also a list of available symbols: arrows and brackets, and at the end — an example of use.
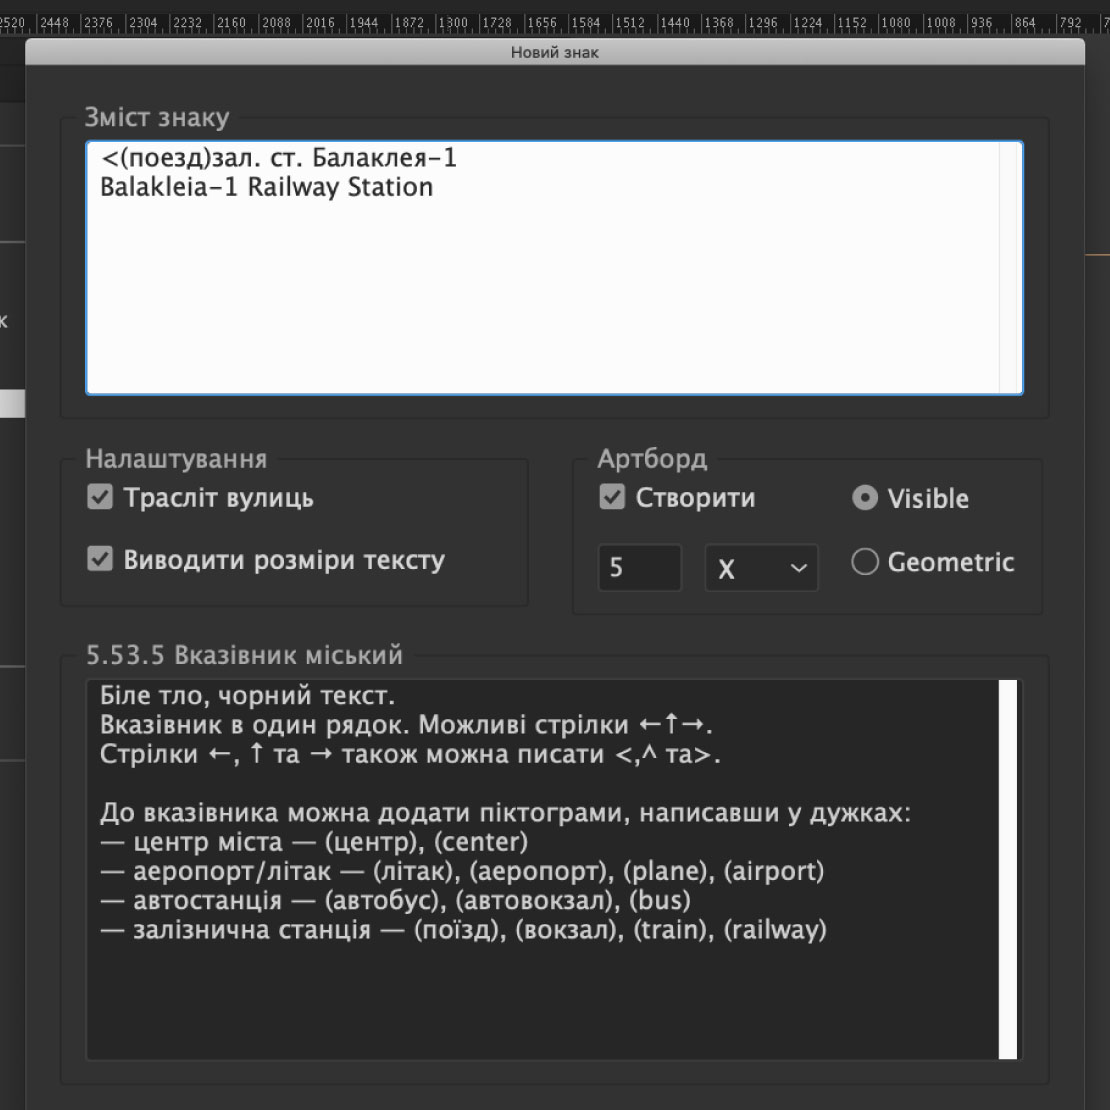
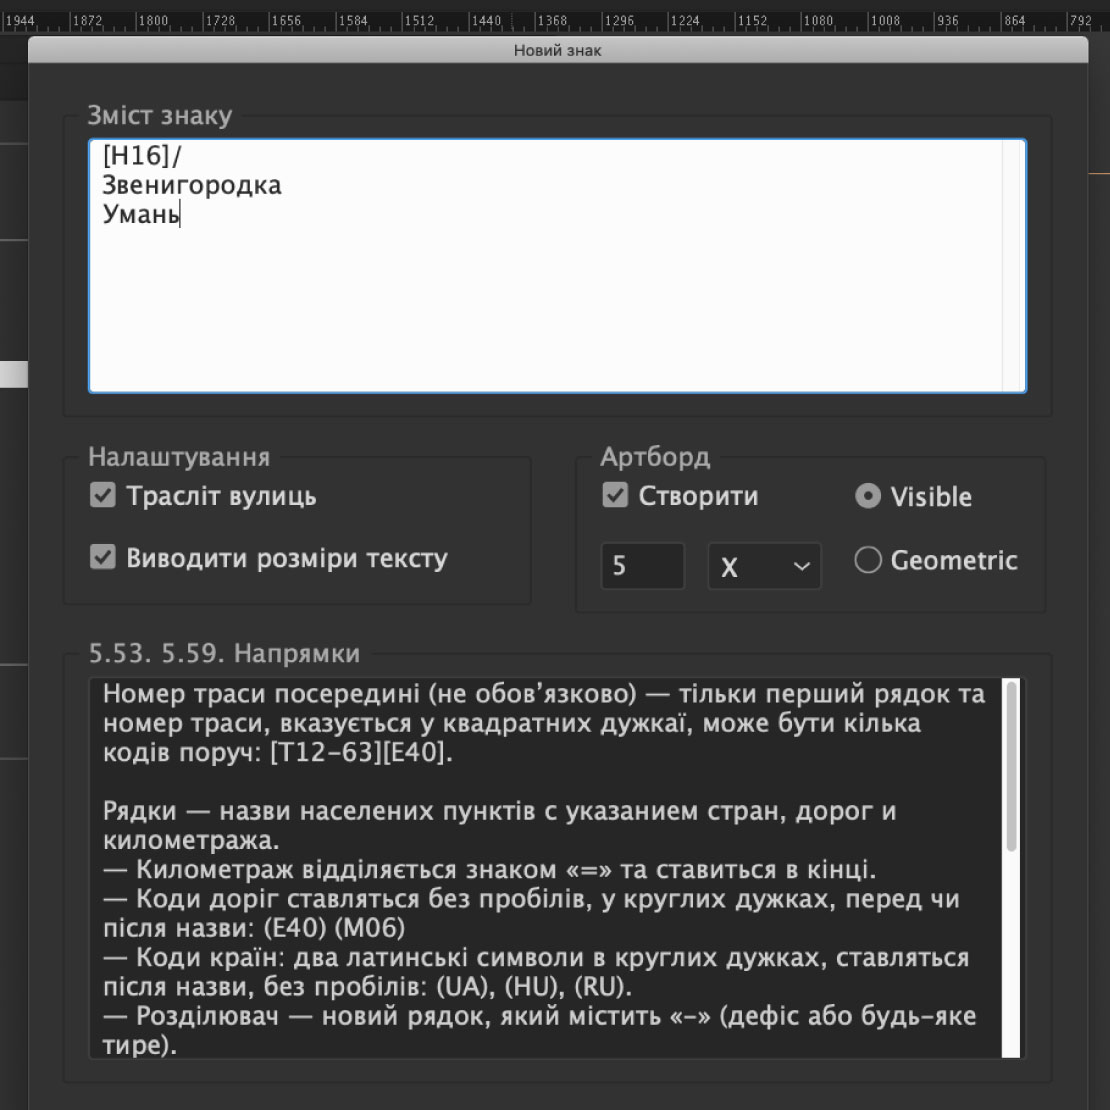
All symbols have simplified symbols. For example, the main arrows "left", "right" and "straight" can be indicated by symbols - "<", ">" and "^", respectively.
You can use different languages to enter symbols for roads (routes). For example, for "T14" you can specify both Russian and Latin "T", and so on for everyone. Any character can be used to indicate a dash next to a road: minus, hyphen, or dash.
That is, if you change the Template on the Site now, then all layouts will have a
Yes! And at once for all designers. Let's try changing the template:
Good. It became clear how to make Signs. How does
Layout Elements
Each sign parameter is stored in such a unit as "Layout Element" — this is a kind of description of the component part of the sign. A set of layout elements forms a template for the future sign.
Each element of the layout has its own unique key code, by which the extension tries to find the properties of each element on the site. The required elements are only the graphic style of the sign (complex outline of the sign) and the main font of the sign (since text alignment occurs according to the letterforms, see Aligning to letter shapes). All other parameters only supplement or update the properties of the base template.
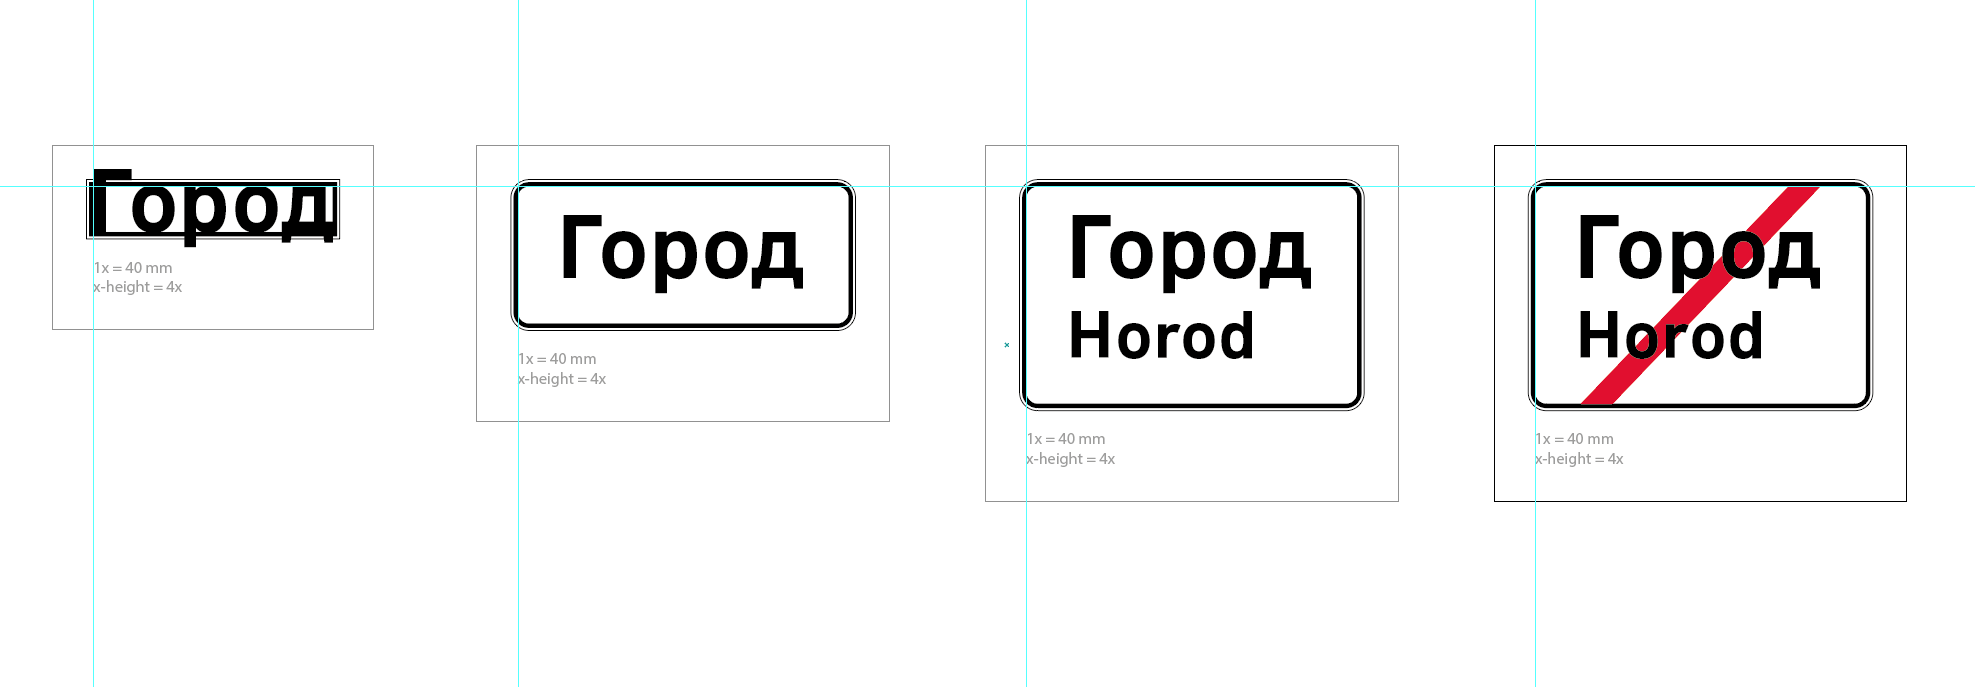
Below is the process of creating a sign template based on a 1-line template:
- 1 — no layout elements (xHeight alignment of the font)
- 2 — added padding and corner radius
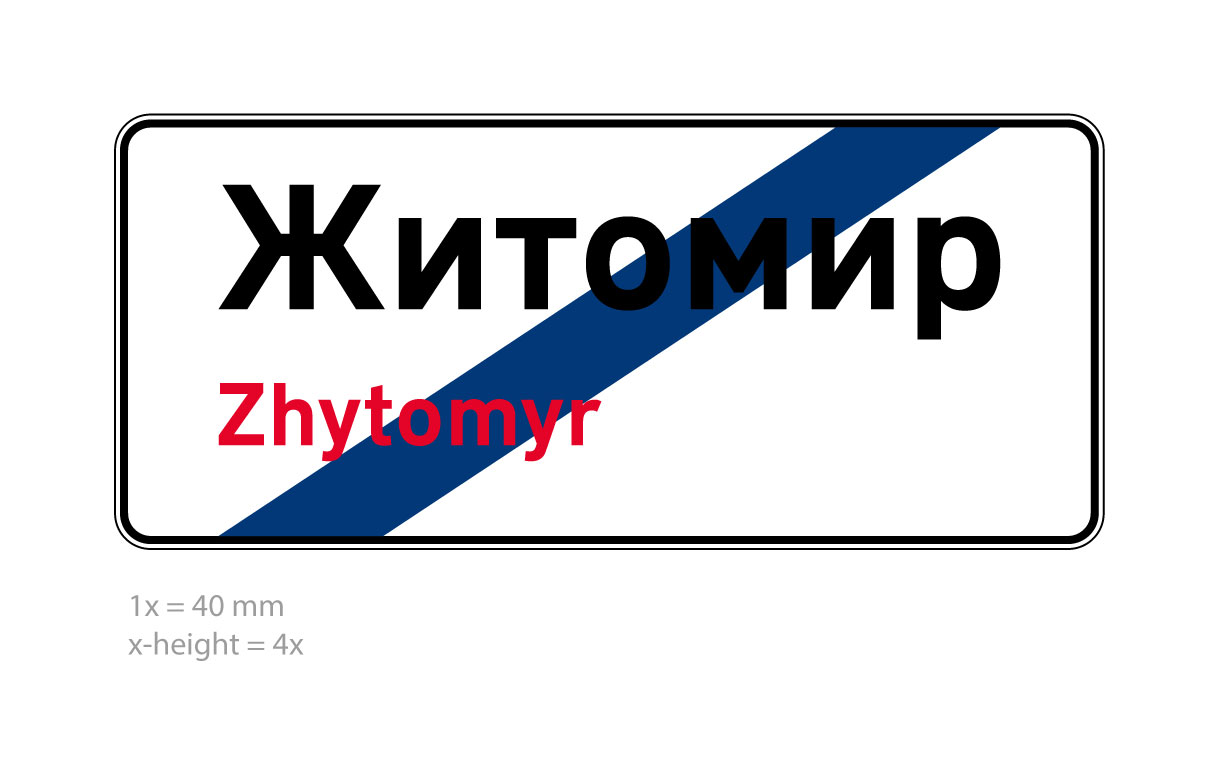
- 3 — added transliteration and indentation from the main text
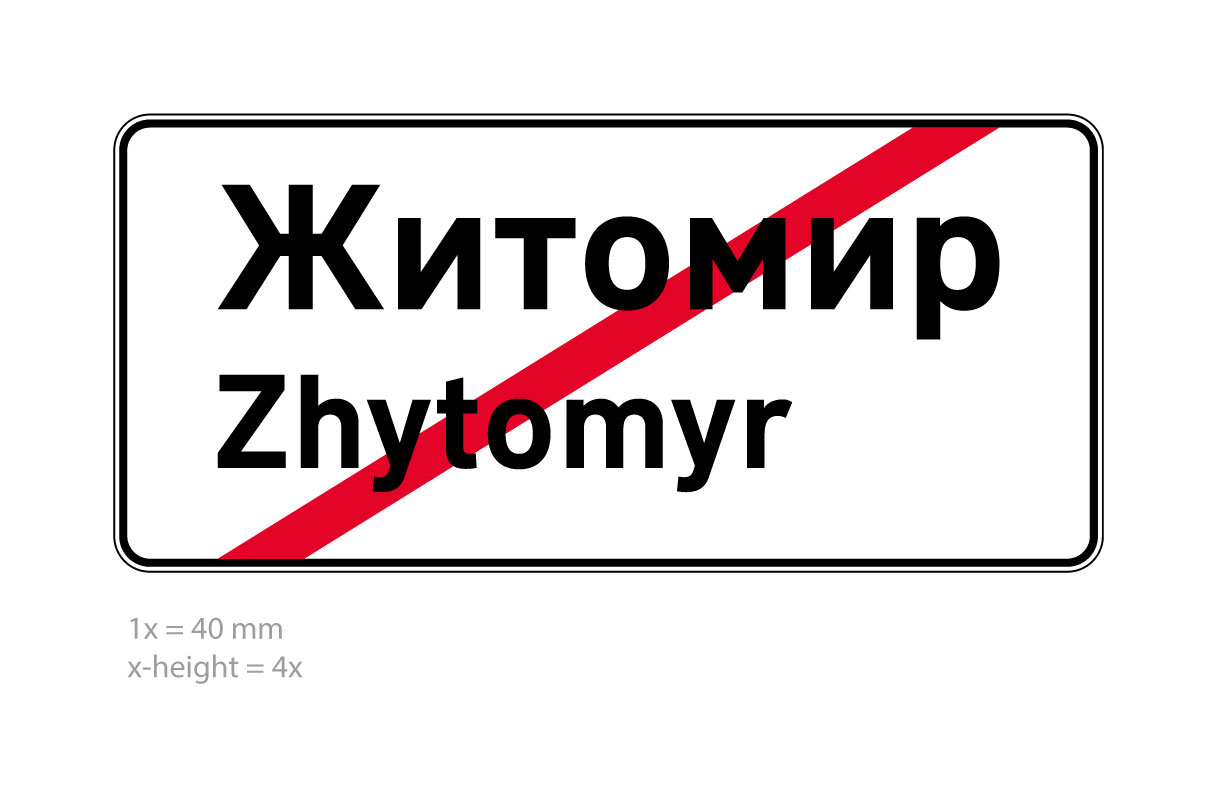
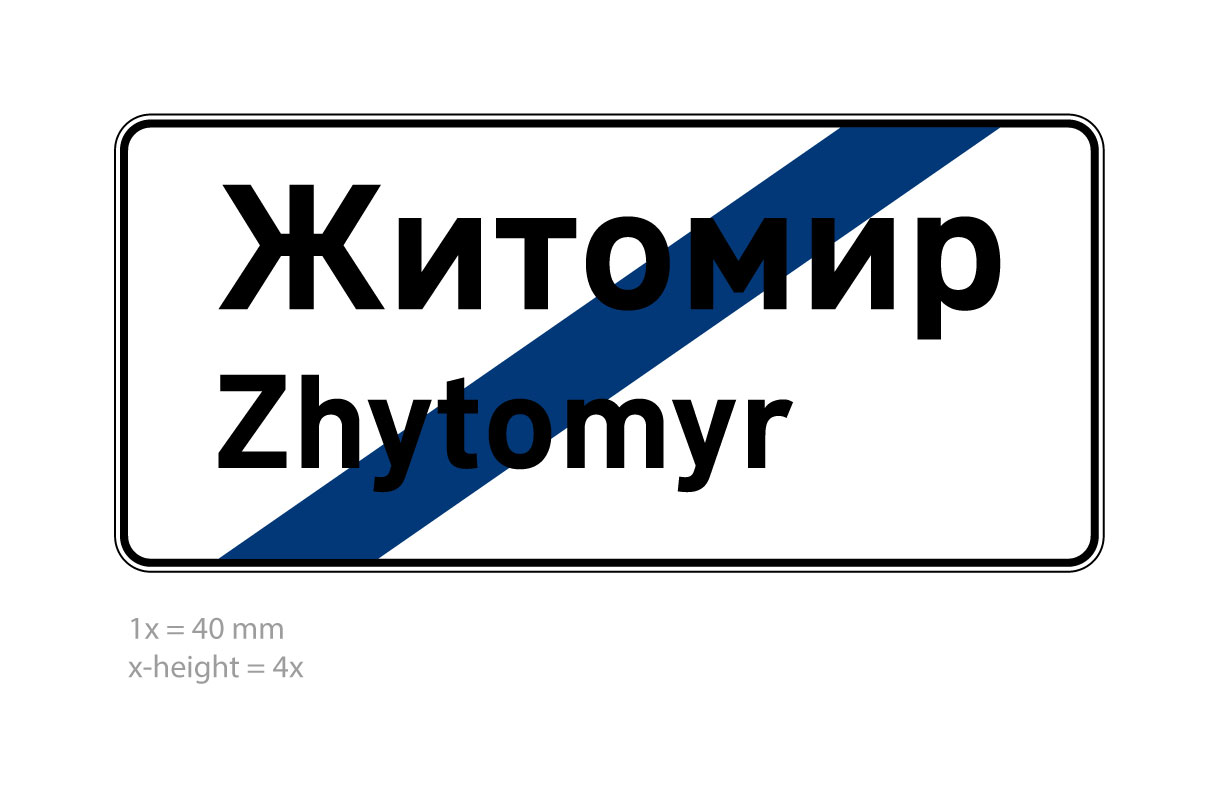
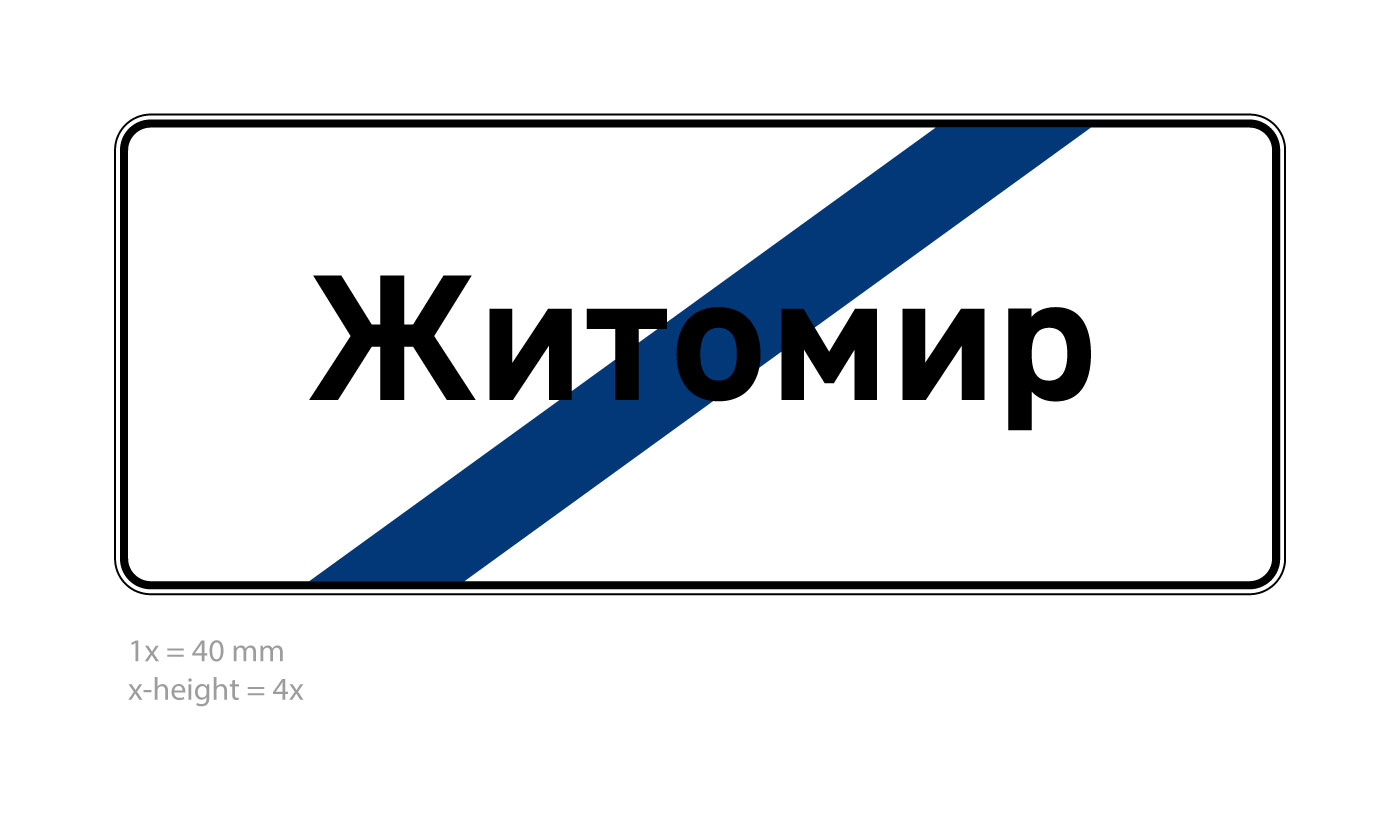
- 4 — added strikethrough with a line of a certain width and color
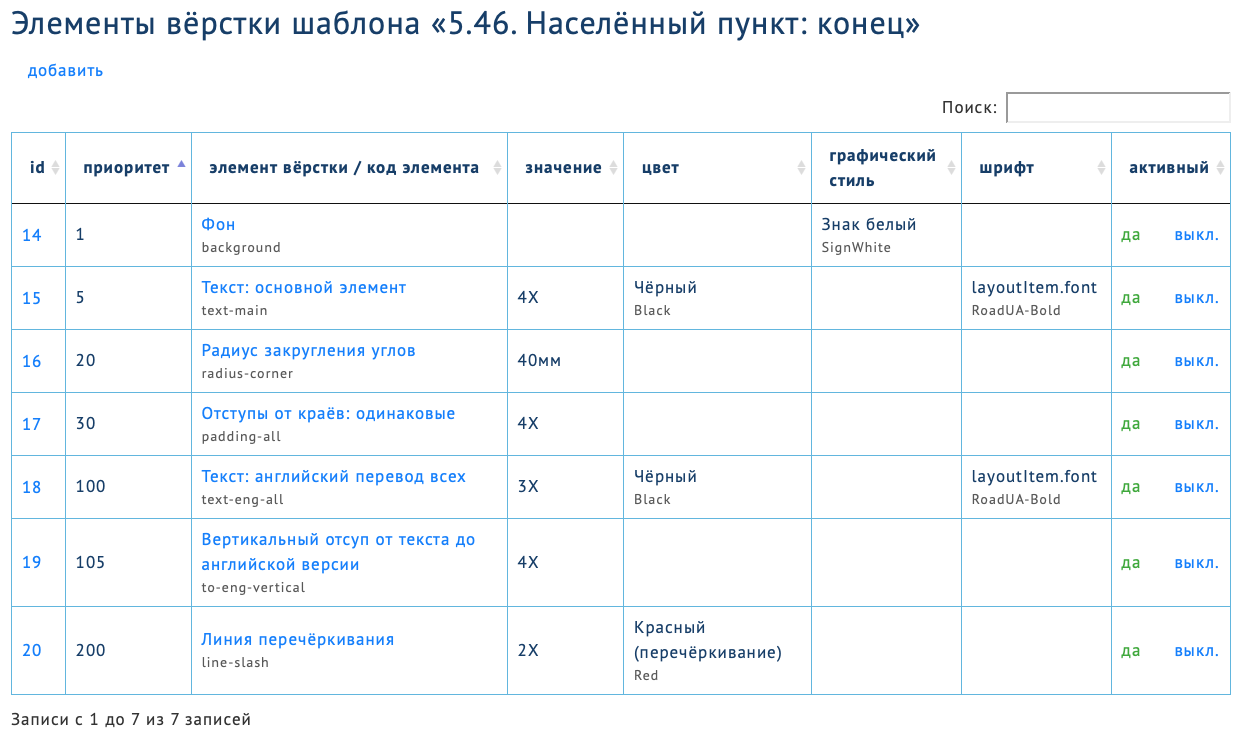
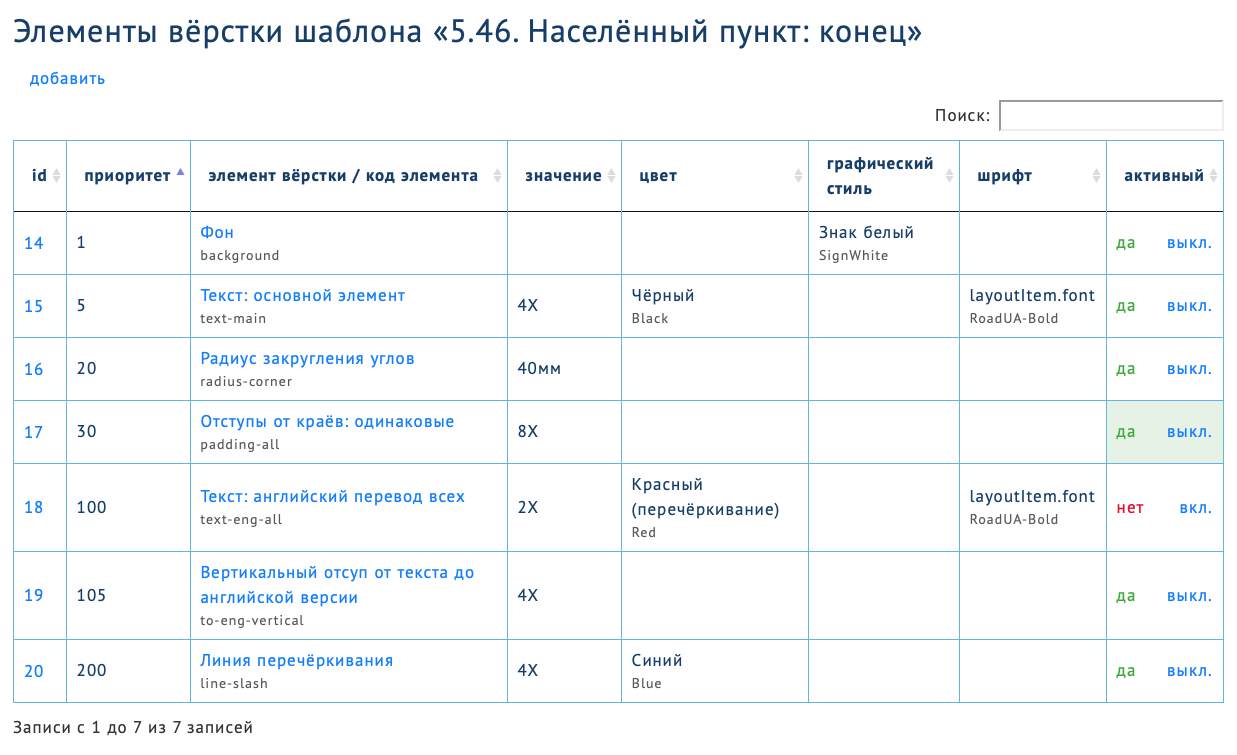
The final list of layout elements looks like this:
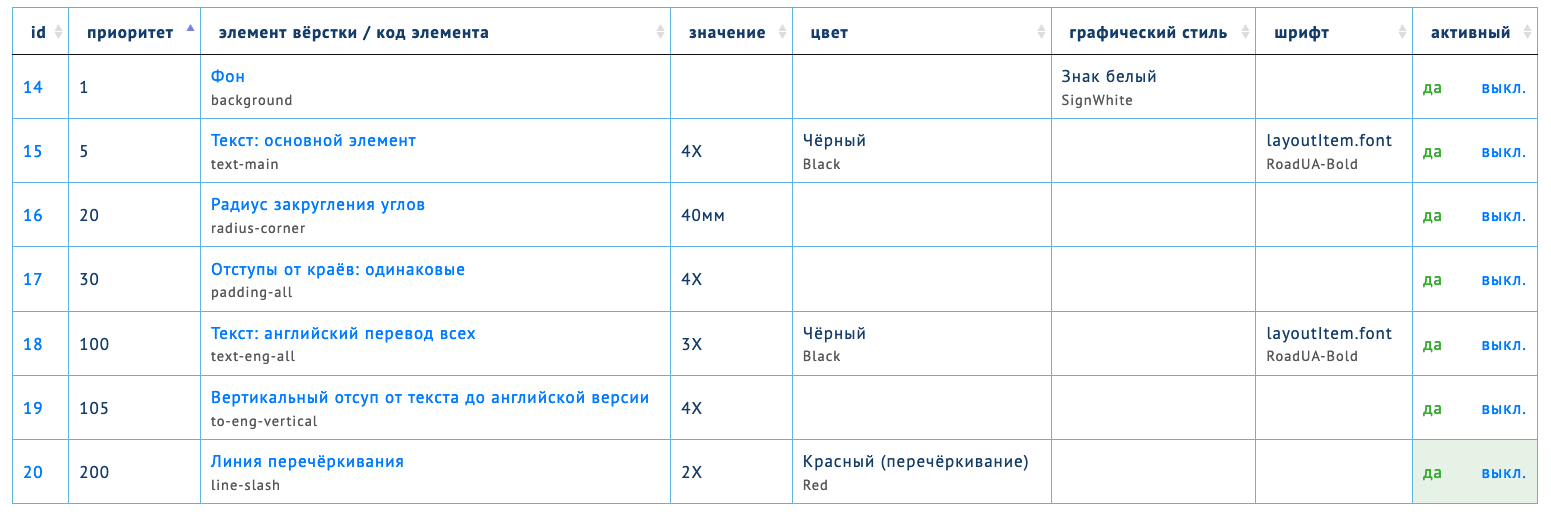
In total, over 20 elements can participate in the layout of layouts:
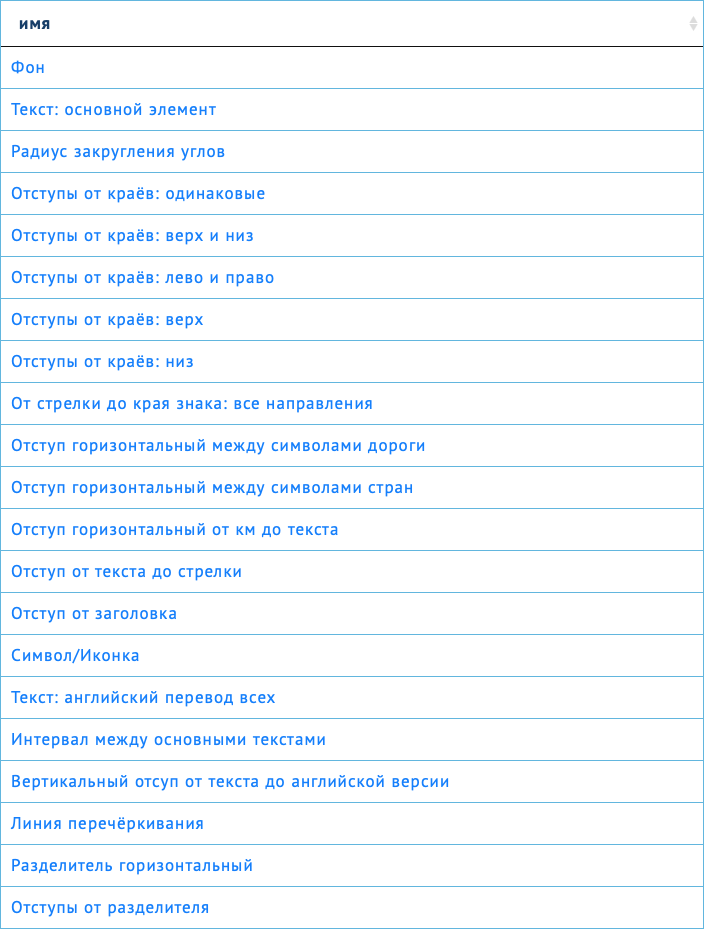
In each template, a layout element is placed with possible parameters:
- value
- unit of measure (if specified)
- color
- graphic style
- font
A set of descriptions of layout elements of the template forms the template.
Units
All sizes of layouts can be specified both in exact units (millimeters) and in parts — X. The X value can be changed in the extension itself.

Units of measurement are also entered in the web interface. You can add, for example, paragraphs if you wish.

When constructing characters, all specified dimensions will be converted to those needed for Illustrator. The size of the part — X — can be changed in the extension.
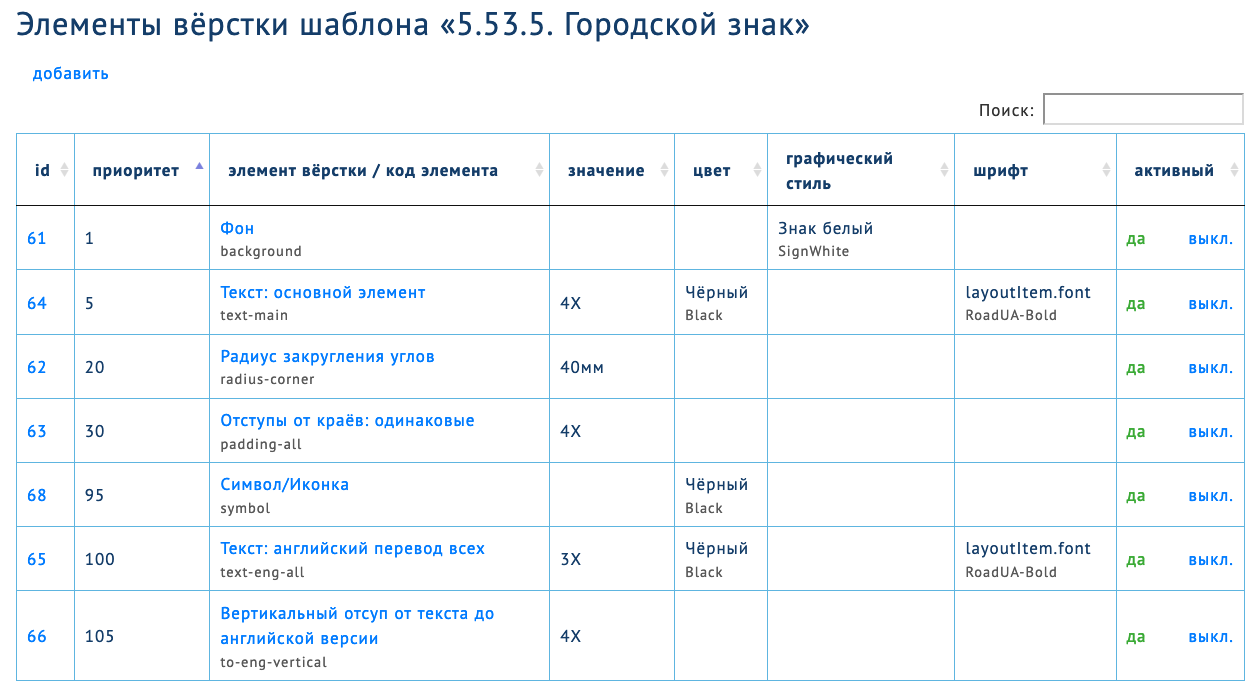
Here is an example of layout elements for a basic city sign template in one line — millimeters and parts are indicated:

Icons and symbols
Signs use 2 types of symbols:
- shapes by size (arrows) — specified height, width, thickness, etc.
- ready-made shapes (bus, airport ...) — curves elements.
The task was to generate all these symbols on the fly, that is, not to store them in the symbol palette in the template file (in which the extension is launched).
Arrows are created according to the specified parameters - this is a simple polygon. A little trigonometry and you're done:
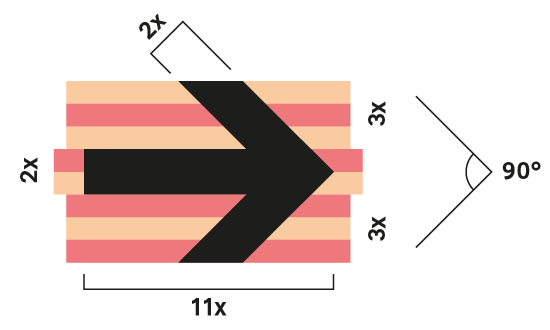
But this method is not suitable for generating vector shapes. Therefore, a system was created that translates a form into a mathematical model in order to save it and then reuse it. Moreover, the shape can be with a cut (train windows) and with a line thickness (circles of the city center). Characters can also point to the right or left — the direction depends on the arrow.
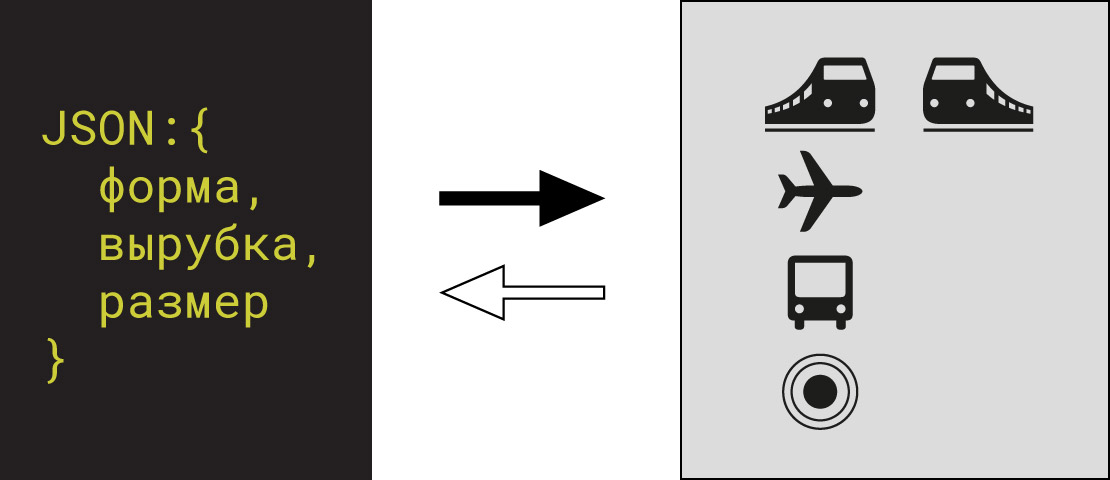
When generating a sign, a vector symbol is instantly created or taken from the symbols palette if it has already been created (all symbols are encoded by the system indicating the symbol color, background color and direction).
In the example below, the template has a color for the symbol / icon. This color is used in the extension:
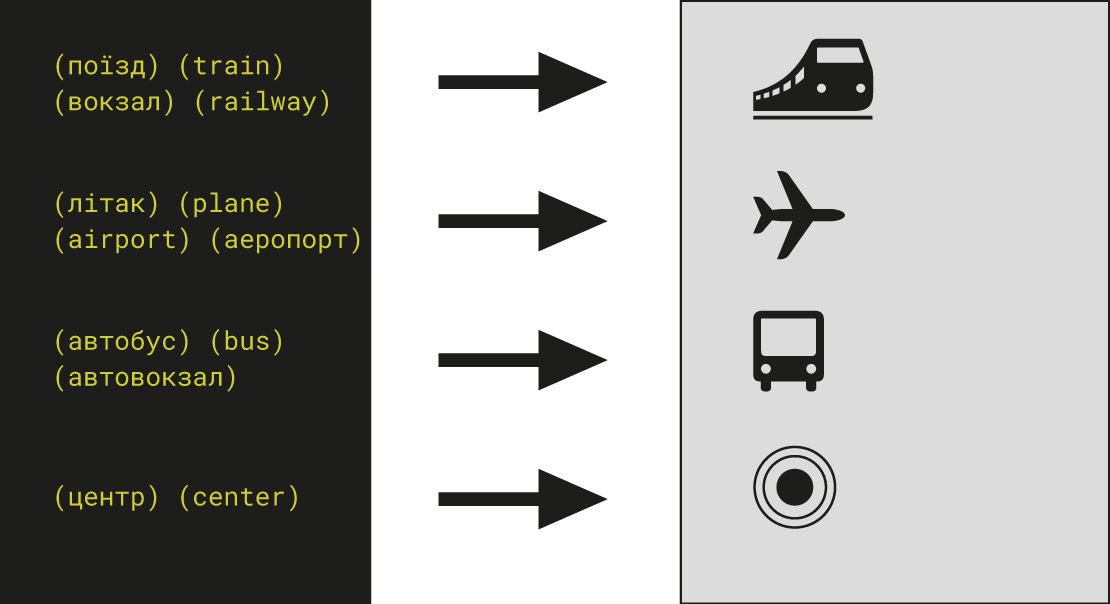
To add an icon to a sign, indicate one of its names:
Road Symbols
For road signs (routes and directions), unified construction guides have been developed: size, color, alignment. They are also generated instantly and added to the symbol library. The next use will take the already prepared symbol.
When creating road symbols, its sizing system is also created so that it can be aligned vertically (from the baseline of the text or to the top edges of large letters) and horizontally. Road symbols come in two sizes: regular and header. The extension allows you to generate the following free combinations:

Fonts
Font descriptions are stored in the web interface: their name in Adobe and the font style. When placing text in a sign, formatting from the template is applied to it: font, size and color.
The size of fonts is interpreted by the generator in different ways: in text blocks, the font size is calculated according to the required xHeight font size, and in road symbols - according to the size of capital letters.
Colors of objects and texts
The web interface stores all the colors used: their name in Adobe (in the brush palette) and CMYK values, as well as an additional RGB value, HEX value (for display in the web interface) and RAL name (for output in the artboard legend):
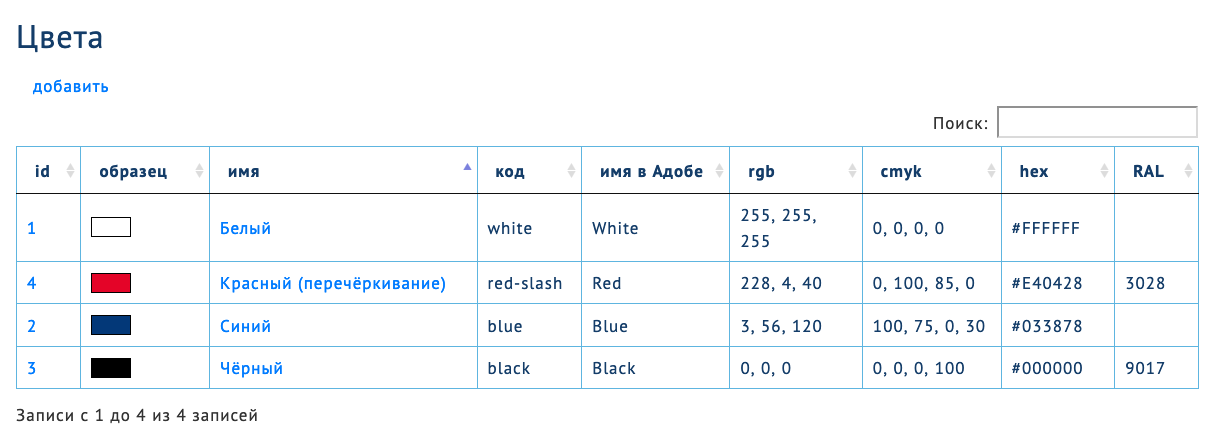
When generating a sign, the color is searched for in the Adobe palette. If it is not there, then a SPOT-color is created with the specified name in the Adobe palette and with the specified CMYK color parameters. The next time you access the palette, the created color will be used.
All colors are created in a special color folder.
Subtle but important details
Aligning to letter shapes
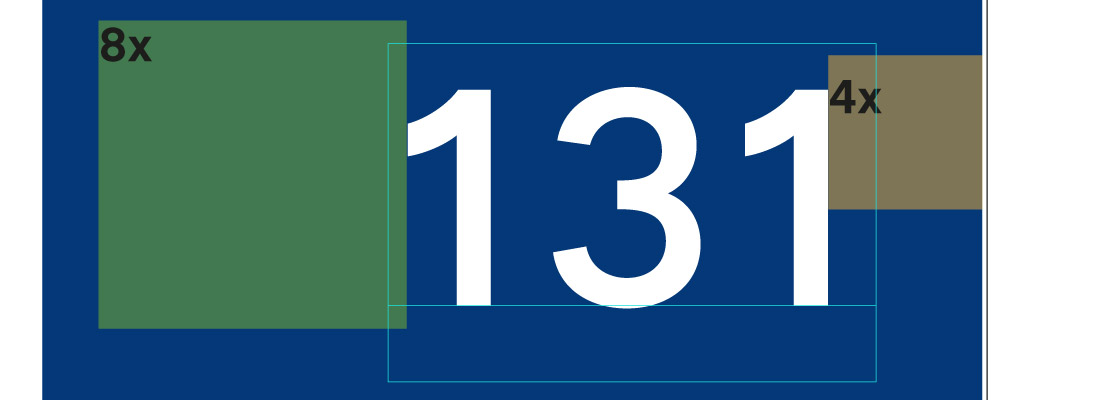
By default, Illustrator creates texts and aligns their sizes to the font size. In this project, it was required to align the texts exactly according to the very shapes of the letters. For this, a special script was made that calculates indents on all sides from the letterforms to the edges of the size pad in order to move the text to the right place.
In the example below - a fragment of the alignment of the mileage "131" from both sides. The blue lines are the type area along which Illustrator aligns the text. But the number "1" is much smaller in the width of the size area, so the generator automatically calculates the indents of the text on all sides and places the text strictly according to the alignment elements of the layout:
And how can this tool be improved?
Good question! And there are some interesting directions here.
Layout Queue
We have now implemented the generation of one sign per operation (with an artboard for it). That is, the operator enters the content of the sign into the extension by hand and immediately receives the result.
The next stage is the layout of any number of layouts based on texts from the database. An artboard will be created for each sign, guides and a technical legend will be placed. This will generate a whole area of sings without possible human error.
Reusing Templates
Template inheritance is now programmed into the extension. But you can make the system more flexible: customize template inheritance right on the site. The template administrator will be able to combine templates to get a new template.
We will research this topic, but for now, subscribe to the telegram channel to keep abreast of all the news!
Transliteration of terms
Script of transliteration of Agent zmin works in the urban template. The Generator analyzes the content of the sign and uses it not only for street names, but also for the type of street: lane, street, avenue, and so on. Moreover, on the layout, the street type, for example "st.", Is placed before the name, and in transliteration — after the name.

On the sign generation interface there is a checkbox "Street transliteration" — it allows you to catch abbreviations of street types and put a corresponding abbreviation after the name.
If the transliteration of pointers differs from automatic, then on templates you can specify the text in the second line:

Creating an artboard
Extension can create an artboard for each sign with the specified margins around the sign. Margins can be calculated in two ways: from the visible edge of the sign or from the shape of the sign (excluding the width of the double outline of the sign).
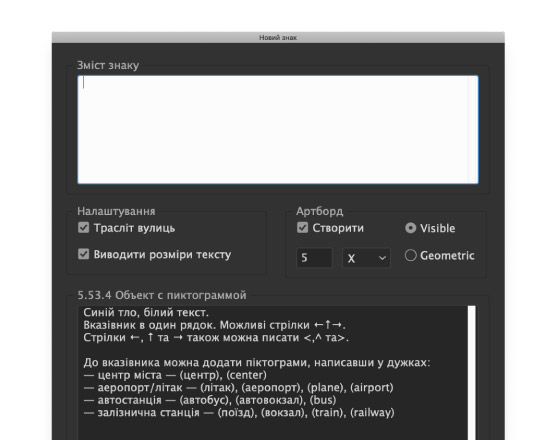
All changes to the extension settings are saved for the duration of the session in Illustrator, that is, you do not need to set values every time.
Access
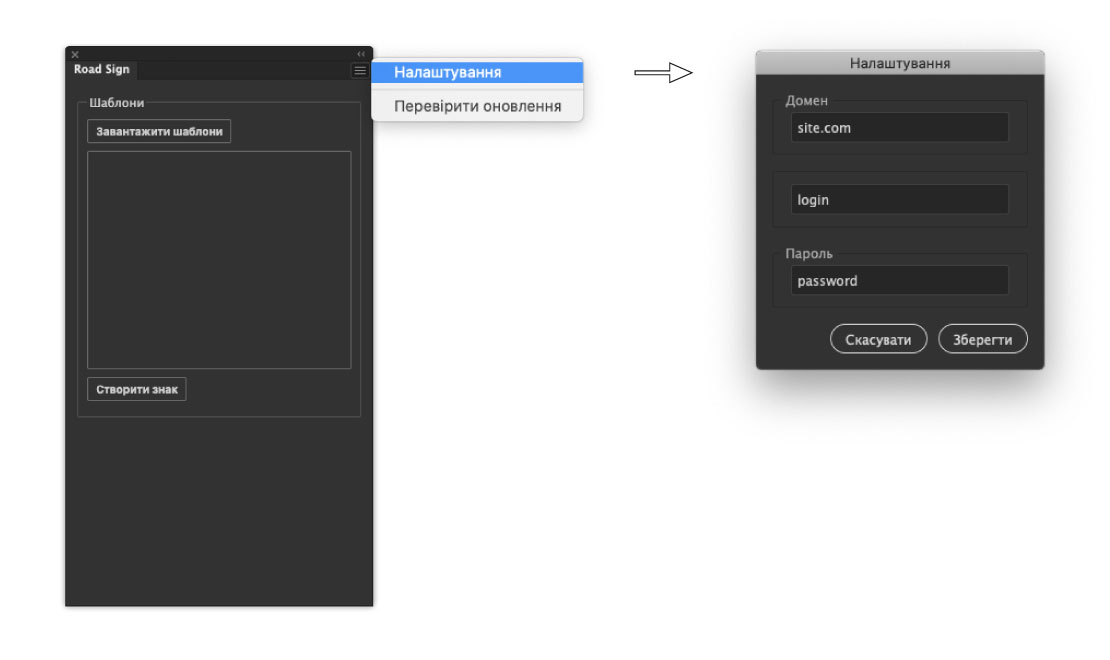
Access to the administration of templates is closed. Access to the template API is also closed. Access is configured in the extension itself:
Wow, how many! And you can see the real result of the work?
Of course! On the site of the team Agents zmin there is a complete description of the project and results. And also in the telegram they conduct a navigation update channel. Subscribe!
